Your air vents collect a lot of dust, dirt, and other particles floating around in the air. They get dirty surprisingly quick, and dirty air vents could be negatively impacting your indoor air quality. You need to clean your air vents on a regular basis, depending on how quick they get dirty. What do you need to do to clean your vents, and how should you do it? Here’s our simple DIY guide on how to clean your vents.
What You Need To Deep Clean Your Air Conditioner Vents
Vacuum with a hose
Screwdriver (type of screwdriver depends on your vents)
Dish soap
A scrubbing brush
Gloves
A bucket or a bathtub
Steps To Deep Clean Your Air Conditioner Vents
Intro To The Guide
This will work for floor vents, wall vents, and ceiling vents. It doesn’t matter where your vent is mounted, this guide will work for any of them. These instructions are general and may not work for all types of vents; however, most residential vents should be relatively simple to clean. Turn off your HVAC system
Before cleaning anything, turn your HVAC system off! That includes your furnace and your air conditioner. You should be able to do this through your thermostat, but you can also turn them off manually
Remove the vents.
Some vents can be easily pulled off, but many require a screwdriver. Take your vents off and put them to the side.
Vacuum the ducts.
Your ducts will likely be dirty, so take your vacuum’s hose and let it run! Get as much dust and dirt as you can out of the ducts. Don’t go too deep into the ducts: there’s no reason to clean out the entire duct at this stage, just the area near the vents.
Dust off your vents.
Use a duster and get all the extra dust and dirt off of your vents. Take this dust and throw it in the trash: try not to get too much of it in the air! Preferably, dust off your vents inside a garbage bag so that the dust doesn’t fly up into the air and up your nose!
Prepare some soapy water.
Get some warm water and mix in some dish soap. Make sure the water has a good deal of lather in it: this way, you know the water has been sufficiently soaped.
You want to do this in your bathtub, but if you don’t have a bathtub, a wash basin or a bucket will do just fine.
Soak your vents for up to 15 minutes.
This is where the real cleaning happens. You want to soak your vents in the tub or basin for 10 to 15 minutes. It’s not necessary to let them soak for longer than 15 minutes, and if your vents are made of iron or non-stainless steel, it may cause them to rust.
The reason we soak the vents is to get rid of any grease or gunk that allows dust to collect on the vents. This way, when you put them back, you won’t have to clean them again for a while.
Dry your vents with a towel and put them back on.
Putting your vents on should be as simple as taking them off, however ceiling vents might be a little annoying. It’s okay if your vents are still a little wet: it won’t cause any issues with your HVAC system. Try your best to get them as dry as possible though.
Replace your air filter & turn your HVAC system back on.
Go to where your furnace is and replace the air filter. If you’ve been having a problem with dusty vents, you’re likely dealing with a clogged filter.
If you find the filter to be clear, then you don’t have to replace it.
After replacing your air filter, turn your HVAC system back on. source
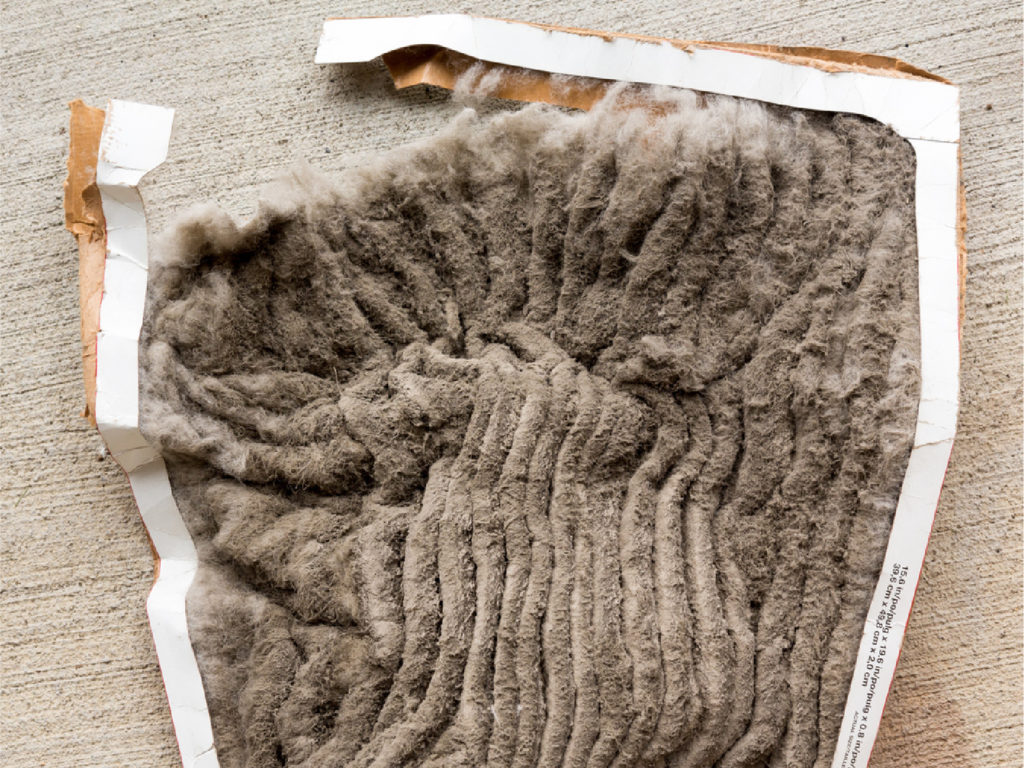
AC filters are one of the most ignored components at home. Why wait until your unit malfunctions or breaks down in order to take action? You see, your filters play a major role in cleaning the air that passes through AC. They trap and prevent particulates and contaminants that would otherwise affect the health of those living at home.
While it’s possible to run your system with no filter in the air conditioner, HVAC experts don’t recommend it at all. Why? It’s because having no filter in the air conditioner leaves your system susceptible to all kinds of debris and dirt that would break down your HVAC system or result in expensive repairs.
How Often Should Filters Be Changed?
So “How often should I change my furnace filter?” This is a question many homeowners ask and the answer depends on various factors. They include: the type of filters used, your indoor air quality, the number and types of pets at home, the number of house occupants etc. A good rule of thumb according to HVAC experts is to replace the air filter every 30-90 days and not exceeding 90 days.
Depending on the type of air filter you are using, you will need to follow different schedules to ensure that the filter is always functioning for optimal performance. Most manufacturers recommend that basic filters are changed every 30 to 60 days, but there are other circumstances that could affect that schedule. A filter in a regular home with no pets should be changed every 90 days.
3 things that happen when you don’t change your air conditioner dust filter
When air filters are not consistently changed, they get clogged by the buildup of particles and contaminants that stick to the filter. While the filter is designed to accommodate these minuscule items, the buildup creates an almost impenetrable barrier so that the air cannot completely flow through, which can ultimately cause multiple problems for the entire HVAC system.
Higher Energy Bills
When the filter becomes clogged, air cannot easily flow through the system. This causes the whole system to have to work harder to distribute heat or air where it is needed, which increases your utility bills since the air is running for longer.
Poor Temperature Regulation
Since clogged air filters make the system strain to create airflow, warm or cool air cannot adequately go where it is needed. This means that some rooms could be too cold during the winter or too hot in the summer.
Health Concerns
If the air filter is clogged and cannot trap contaminants as it did before, those things can end up back in the air that everyone in your home is breathing. Immediate issues could include headaches, itchy eyes or throat, and dizziness. If the air filters are not changed and the issues continue, the long-term effects could be respiratory diseases, heart disease, or cancer.
Furnace Failures
As the system is working harder to get around clogged air filters, it can cause the entire system to overwork and eventually break. If this happens, you’ll need to replace the entire system, which can cost anywhere from $4,000 to $12,000. Air filters usually cost less than $40, so they are easy to replace frequently compared to replacing the entire system.
Clamped-Up Coils
Evaporative coils, which help remove heat from the air to keep your home cool, can freeze up if they are overworked. With a clogged air filter, the air won’t flow over the coils correctly, which makes them stop working and leads to total system failure. Again, the price to fix this issue is greater than simply purchasing a new air filter every few months. Protect your HVAC system and your wallet by replacing the air filters on a regular schedule.
MONEY COMFORT AND HEALTH ARE AT RISH FOR FAILURE TO CHANGE THE FILTER ON A REGULAR BASIS
Changing your air conditioner dust filter isn’t an option. Here’s what happens when you don’t change it:
You’ll end up spending more on energy bills. As previously discussed above, failing to change your filter means debris and dirt will soon clog your unit, causing it to overwork. This in turn raises your energy bills.
It takes longer to cool your home. With an old air filter running, you’ll notice that it takes so much time for your AC to cool you home. You may also notice certain rooms getting cooler than others. If this is the case, then you should definitely consider replacing your filters.
Your health is at risk. If your air filter is clogged with dirt and debris, and can no longer trap contaminants, your health and those around you could be at risk. The contaminants can end up back into the indoor air that you breathe. This can cause health issues such as dizziness, headaches, irritable eyes or throat etc. Long-term side effects of this could be respiratory infections, heart problems or even cancer.
How Do Air Filters Work?
Air filters are generally made of spun fiberglass or pleated paper and surrounded by a cardboard frame. They are inserted into a specific place in the HVAC systems and act as a barrier to prevent contaminants and other particles from circulating in the air, or from reaching sensitive parts of the system. Some of the common things that filters block are dust, pollen, lint, mold, hair, animal fur, bacteria, and more.
What To Do
If you haven’t changed the air filters in your home lately, your next step should be to figure out which filters you need and replace them as soon as possible.
How to Clean Your Laminate Floors (Without Ruining Them)
For a Standard Weekly Clean
“Regular sweeping or vacuuming, with occasional mopping, will extend the life of your floor and keep it looking as good as the day it was installed,”
Review these steps to learn how to clean laminate floors on a consistent basis to preserve their quality.
Tip!
Sweep in the direction that the laminate was laid to get better access to the nooks and crannies of the floor.
Step 1: Vacuum
The best preventative care you can give your laminate floors is a weekly vacuuming. Use a vacuum with a brush attachment to keep your floors free of any dirt, debris, and hair that can lead to scratching over time. A dry dust mop works just as well, but make sure to avoid using stiff bristle brushes, as those can scrape the laminate.
Step 2: Wash
For a regular cleaning, the best way to clean laminate wood floors is water. Do not use soap, pine, lemon, or ammonia-based cleaners as they will damage floors and create a streaky haze. Instead, dampen a microfiber mop in hot water, then wring out the mop to avoid leaving big puddles that can seep through the baseboards and leave streaks.
Step 3: Dry
After you’re done moping, use a clean microfiber cloth or a dry mop to dry the floor. Microfiber is a great material to dry laminate floors because it’s gentle and wont cause scuffs or scratches overtime. Overall, it’s important to dry laminate floors as this will prevent moisture from discoloring or warping the flooring over time.
For a Deep Clean
If you need a deeper clean, we recommend using a flathead microfiber mop and laminate floor spray cleaner.
Spray the cleaner on the floor and then wipe it up with the damp mop.
Mop in the same direction as the grain to avoid streaks.
Then use a dry microfiber cloth to wipe the floor.
If you want to put your microfiber mop cover in the washing machine just make sure not to use any fabric softener as it will later cause streaks.
Tip!
When cleaning laminate floors with a mop, start from the center of the floor and work your way towards the outer edges of the room so you don’t end up walking over what you just cleaned!
How to Clean Spills & Stains
Wipe up any spills immediately with a clean cloth to prevent stains or liquid damage to your floor. Here are some smart practices for how to clean laminate floors with stains.
For stains that have already set, dilute ¼ cup white vinegar with 4 cups of water in a spray bottle.
Spray the mixture in small areas before wiping immediately with a clean damp cloth.
Be cautious of spraying too much and damaging the protective laminate layer. When finished, dry completely.
If you drop gum or candle wax on a laminate floor, take a bag of ice and lay it on the spill. Then, scrape it off with a plastic knife. For ink and crayon smudges, take a cotton swab and dip it in rubbing alcohol. Then, blot it on the spot before wiping it away with a dry cloth.
How to Clean Scuffs & Scrapes
If your laminate floors have any scuffs or scrapes, try tending to the marks with a pencil eraser (goodbye, heel scuffs!). To avoid future markings, place pads under the legs of your furniture to protect your laminate in a concealed and inexpensive way.
How to Protect Your Laminate Floors
To keep your floors shiny and free of scuffs and scratches, take these preventative measures to keep your floors looking new.
Don’t wear shoes in the house. Place them on a tray by your front door and wear slippers around the house.
Put a mat under your pet’s water and food bowls as well as your baby’s high chair.
Keep pet’s nails trimmed.
Use area rugs.
source
Laminate Flooring 101: The Do’s and Don’ts to Keep Them Scuff-Free
Prevent wear and tear—on new floors and old—with these DIY cleaning methods
1. Don’t let stains sit on the floor
“If something spills, clean it up immediately,” says Steve Evans, cleaning expert at Memphis Maids. “Use a dense microfiber cloth or a sponge and gently blot until you absorb whatever has spilled.” Tackle stains pronto. Even if your laminate flooring is water-resistant, if you leave liquids for too long, they can potentially damage or discolor the surface.
2. Don’t use abrasive tools
Technology has made a lot of recent laminate flooring materials scratch-resistant, but that doesn’t mean you should reach for abrasive (steel wool, for example) items. You’ll want to use a soft-bristle broom or dust mop to sweep up debris. If you’re vacuuming, be careful to use an attachment without a beater bar or rotating brush, which could scratch the surface.
3. Do (carefully) mop the laminate flooring every two months
Mop every two months or so.
To keep laminate floors fresh, mop them every two months. Damp mops (a.k.a. microfiber mops) are gentle enough to use on laminate flooring. If you’re going to use a regular mop, just wring it out until it’s almost completely dry.
4. Don’t use too much water
“The number one factor to keep in mind is that laminate floors do not get along with water,” Evans says. “At least, with excessive water. Keep water and liquids to a minimum whenever you’re cleaning these floors.” Even if the flooring material is water-resistant, you don’t want the water to pool or seep through the top layer, which could potentially lead to extra installation costs that come with replacing the laminate planks. That said, a traditional mop bucket is a no-no for laminate floors. If you forget to pick up all the water it can also cause staining or fading.
A spray mop could come in handy because sprays limit the amount of water you’re using. Dry the floors immediately.
5. Do skip cleaning products not labeled for laminate flooring use
Oil-based cleaning products can leave streaks and residue, or damage the protective sealant of the floors. If you use laminate cleaner, do so sparingly and apply it to the mop or microfiber cloth rather than directly to the floor. Never use wax or polishes on laminate floors.
6. Do consider a DIY laminate floor cleaner
Make your own DIY floor cleaner. For regular cleaning, combine a teaspoon of clear and unscented dish soap with a gallon of hot water.
another recommended mix is a solution of white vinegar and water because it doesn’t leave a sticky residue, which is often an issue with hard floors. He suggests one part vinegar to 10 parts water. “It’s effective yet not that aggressive to your floors,” he notes.
Another option? If your floor has developed a slight film or waxy buildup on it (which happens over time when the wrong cleaning products are used), you can instead combine a gallon of hot water with a cup of white vinegar. Vinegar, which is a natural cleaning agent, will break down the film without hurting the laminate surface. (Note: The same rules about water apply to either of these DIY solutions. Make sure to wring the mop so it is only slightly damp. Never let water pool on the floor.)
7. Do use household hacks for stubborn stains
For tough stains like candle wax or ink, the best cleaning methods are right at hand. Apply a plastic bag of ice to chewing gum and candle wax, and remove with a plastic knife, scraper, or credit card once it has hardened. Tackle paint, ink, nail polish, and crayon with rubbing alcohol.
8. Do protect the surface from future damage
To avoid future scratches, add furniture pads under the legs of chairs and tables, especially if they get moved frequently. For spots that are likely to get dents or withstand heavy foot traffic, invest in rugs to help prevent wear and tear. Placing a rug under a dining room table or under a desk chair not only saves your floors but enhances your interior decor.
If your laminate flooring already has scratches, you can try the Pergo repair kit to camouflage the damage.
9. Don’t forget a doormat
Dirt that gets tracked in from outside not only makes your floor dirty, but can also damage the floor. The grit, for example, from a dirty shoe bottom can be one of the biggest enemies your laminate floor faces because it can scratch, dull, and even dent. Stop dirt in its tracks with a welcome mat that is as fashionable as it is functional. A woven stripes-and-stripes mat from Hay does just that. Something this low-maintenance can make all the difference.
Natural DIY Ways to Remove Shower Soap Scum and Mildew
How to Make Ugly Soap Scum, Mildew, and Water Marks Disappear Like Magic
Your shower should be the most spotless place in your home – after all, it’s where you go to get clean in the first place! But more often than not, showers are the site of built-up soap scum and mildew.
You probably already know the problem with mildew – it’s a stubborn fungus that colonizes in dark, damp places. Some people are allergic to mold, but even if you’re not, exposure can irritate your eyes, lungs, throat, and skin.
Though soap scum may just sound like a nuisance, it’s still a concern, as it’s made up of soap, water minerals, dirt, skin cells, and bacteria. And no one wants to bathe in that.
Though your instinct may be to mercilessly bleach these shower offenders, exposing yourself and your family to those harmful chemicals isn’t necessary. Try these natural cleaners to fight off soap scum and mildew instead.
DIY Shower Cleaning Solution #1: The Borax Edition
Borax, a natural mineral that doubles as a deodorizing scouring powder, is a safer alternative to harsh off-the-shelf chemicals. An added bonus? It kills mildew and keeps it from coming back.
Here’s what you need to scrub away pesky soap scum and mildew:
One cup of borax.
Two tablespoons of dishwashing detergent.
One to two cups of water.
Mix these components together until they form a paste. Use a soft bristle brush to apply the solution to the area, and let it sit for 15 minutes. Use the brush to scrub away the affected spot until the buildup is gone and rinse with hot water. Borax can be slippery, so spend some time making sure it’s completely rinsed away.
DIY Shower Cleaning Solution #2: The Baking Soda Trick
Baking soda is a favorite ingredient in DIY cleaning solutions. That’s because it’s abrasive enough to remove tough stains and buildup (e.g., soap scum!) and offers some mighty deodorizing action to boot. (One of the many reasons it’s so handy for pet stains.)
To make this solution, gather the following ingredients:
One cup of baking soda.
One tablespoon of dishwashing detergent.
One to two cups of water.
Mix them together until they form a paste, and then use a soft bristle brush to apply the solution to the area. Let it sit for 15 minutes before you scrub the soap scum and mildew away. Rinse with hot water, wipe away any remaining grime, and you’re golden!
DIY Shower Cleaning Solution #3: Vinegar to the Rescue
Vinegar is your secret weapon to combat any greasy or slippery areas. It also helps neutralize odors, although some would argue it has its own acidic scent.
The nice thing about using a vinegar-based shower cleaning solution is that it is exceptionally cheap. Often, you can get a gallon of white vinegar for a buck or so at your local grocery store. So if you have some on hand already, why not give it a try?
Here’s what you need to make this solution:
Four cups of white vinegar.
Four cups water.
One tablespoon of dishwashing detergent.
Mix these ingredients together in a spray bottle and spray the affected area with the solution. Let it sit for 15 minutes, and then scrub the soap scum- or mildew-heavy spot with a soft bristle brush. To finish, rinse the area thoroughly with hot water and wipe away any grimy remnants. source
essential oil (I use combo of lavender, lemon, eucalyptus, and tea tree)
16 oz spray bottle
Homemade Shower Cleaner Recipe (magically cuts through soap scum on tubs, tile, and showers)
step 1: add 1/2 cup Dr. Bronner’s Sal Suds OR Dawn Ultra or other dishwashing soap to 16 oz spray bottle
note: Sal Suds is made by Dr. Bronner’s, the same company that makes liquid Castile soap. Like Castile soap, Sal Suds is made from plants. But Sal Suds is a much more powerful cleaner than Castile soap. It cuts through soap scum, dirt, and grime with ease. Do not substitute Castile soap in this recipe; it won’t work as well.
step 2: add 1.5 cups vinegar
tip: don’t fill the bottle completely full. You’ll want to leave a little space for the essential oils and the sprayer. If you fill the bottle too full, then it will overflow when you put the sprayer on.
step 3: add 25-30 drops essential oil
These essential oils not only smell great, they also help disinfect surfaces and help kill mold.
Here’s what I use:
7 drops lavender essential oil
7 drops lemon essential oil
7 drops eucalyptus essential oil
7 drops tea tree essential oil
step 4: put the spray top on and gently mix to mix well
How to Use
shake bottle to mix ingredients
spray on shower, tub, tile, faucet, and glass shower doors
let it sit for at least 30 minutes (and as long as overnight, if needed)
I love a clean shower, but like pretty much everyone else in world, I don’t like to spend time scrubbing and cleaning my shower.
That’s why I created my homemade shower cleaner and soap scum remover. It’s magic!! It uses essential oils and other natural ingredients to get my shower super clean, glass shower doors sparkling, and faucets shiny.
But what can I use in between deep cleaning my tub and shower to keep it looking amazing? In the old days before I discovered essential oils and natural DIY, I used to use Scrubbing Bubbles Daily Soap Scum & Mildew Stain Remover. It worked great at keeping my shower clean, but the EWG has rated it an F, and that absolutely does not work for me anymore.
Now I know better, and I insist on natural, non-toxic cleaners in my home.
So I researched, read, and experimented to come up with a homemade non-toxic daily shower cleaner that would work as well as Scrubbing Bubbles Daily spray but not have any of its toxic chemicals. This is what I came came up with. It’s a daily shower cleaning spray that’s both natural and actually works! After showering, just spritz it on the tub, shower doors and walls after your shower each day and it will keep your shower sparkling clean for a week (or more).
What’s in homemade daily shower cleaner
This website contains affiliate links. This means that should you click on certain links, and then subsequently purchase a product, I will receive a small commission. The price is exactly the same for you as it would be without the affiliate link.
Hydrogen peroxide disinfects, sanitizes, and deodorizes. It also boosts the cleaning power of other ingredients, like soap. I use hydrogen peroxide in my toilet cleaning fizzies, homemade bleach alternative, and to whiten grout. It’s a powerful, but mild natural cleaner.
Alcohol is a solvent. It dissolves any dirt, oil, soap scum, and grime in the shower. It also disinfects. And alcohol even helps leave a super shiny finish on glass, porcelain, stainless steel, chrome, and tile. Thanks to the rubbing alcohol, your glass shower doors will sparkle, your shower tile will gleam, and your faucets and fixtures will shine.
distilled water
Distilled water is used to dilute and thin the mixture so that it sprays more easily and will cover a larger area. Use distilled water (or substitute boiled and cooled filtered water) so that the shower cleaner stays fresh longer.
Sal Suds is a gentle soap that cleans with exceptional power. It’s equally effective against hard or soft water. And it rinses cleanly and easily. Sal Suds is the amazing ingredient in this homemade shower spray that eliminates the soap scum and soap buildup on shower doors, walls, and floors.
Vinegar is a fantastic natural cleaner. It disinfects, deodorizes, and easily cuts through dirt, grease and grime. Most importantly, we use vinegar in this daily shower cleaner because it’s a natural acid that kills most mold spores.
tea tree essential oil
Tea tree essential oil is a powerful antifungal that can kill mold and mildew and help prevent future regrowth.
How to make non-toxic daily shower cleaning spray
step 1: add 1 cup distilled water to a 12 ounce or larger spray bottle
tip: Choose a spray bottle made from material safe to use with essential oils. Glass, stainless steel, and certain types of plastic (such as, PET plastic #1 or HDPE plastic #2) are all good choices.
tip: If you don’t have distilled water, you can substitute with boiled and cooled filtered water.
tip: use a funnel to make it easier to pour the water in the bottle without making a mess
step 2: add 1/8 cup hydrogen peroxide
step 3: add 1/8 cup rubbing alcohol
tip: rubbing alcohol is also known as 99.9% isopropyl alcohol
tip: If you don’t have rubbing alcohol, you can substitute vodka or everclear.
step 4: add 1/2 teaspoon Sal Suds or dish soap
step 5: add 1 teaspoon white vinegar
step 6: add 20 drops tea tree essential oil
tip: Tea tree essential oil is also known as melaleuca essential oil.
I use packing tape to apply the label to bottle. It’s cheap, sticks well, and keeps the label from getting wet and dirty.
How to use
I know it sounds funny, but daily shower cleaners work best if you start with a clean shower. Yes, to get the best results, you need to clean your shower before you use this spray to keep your shower clean. So, clean your shower first with my homemade shower cleaner (recipe here). It’s just 3 ingredients and super easy to make. Use it to deep clean your shower about once a week or a couple times a month. Then use the daily shower cleaner to keep tub and shower clean in-between deep cleaning.
Shake well before each use
Spray down shower doors and walls after every shower
There’s no need to scrub, wipe, or rinse. This daily cleaner does all the work. A daily spritz of this homemade shower spray after your shower will keep soap buildup and mildew at bay.
What’s the best selling natural stone for countertops? Granite, of course!
Granite is, hands down, the most popular countertop surface chosen for upscale homes. It’s a substantial investment, though most homeowners would agree that the benefits are well worth every penny spent.
The beauty of a granite countertop is unsurpassed, but it’s not just the aesthetic value that makes this such a popular material – it’s the longevity and granite countertop durability.
Granite countertops can last a lifetime if correctly maintained. Which means it’s vital to learn how to care for it properly!
Granite countertops are porous and can stain if liquids sit on them for too long. Here are some tips for caring for granite countertops:
Seal – Seal your granite every six months to one year to help protect it from stains and make it easier to clean.
Avoid harsh chemicals – Don’t use products that contain lemon, vinegar, lime, ammonia, bleach, or glass cleaners, as these chemicals can break down the sealant and damage the granite over time. Instead, use a pH-neutral cleaner and a soft cloth or sponge to clean the surface.
Keep dry – Prevent hard water and other liquid stains by keeping water off the surface and around the sink and faucets.
Blot spills – Wipe up spills immediately with warm water and a mild dish soap.
Clean daily – Use a soft cloth to dust the surface, or wipe it down with plain water or a mild soap
FIRST STEP: SEALING
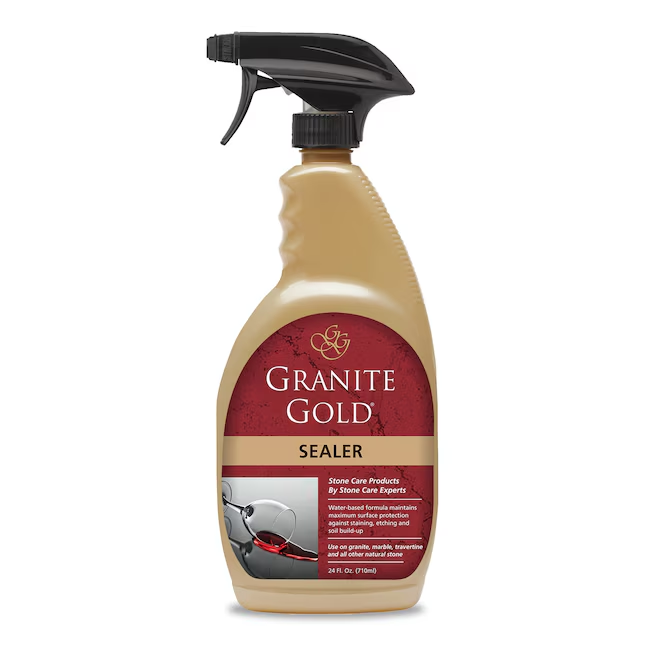
Granite Gold Sealers 24-Oz Granite Sealer
Like any natural stone, granite needs to be sealed to create a nonporous finish and protect it from stains. Proper sealing should be part of the installation process, but it will need re-sealing at least once a year. White granite countertops may need sealing more frequently than darker colors, as they are more likely to show stains. To see if your granite countertop needs sealing, just splash a few drops of water on the surface.
If the water beads up, your countertop is in great shape. If the water is absorbed, it’s time to re-seal. Applying sealer is a simple process. First, make sure the counter is clean and dry. Following the directions on the container, apply the sealer with a clean, dry cloth. Let dry, then apply a second coat. Avoid food preparation on your counter for 24 hours to ensure it is fully cured and water-repellent.
DAILY CARE
When your granite countertop is properly sealed, daily care is a breeze. Just use a soft cloth to dust the surface, or wipe it down with plain water or a mild soap. If your countertop needs extra cleaning, use a specially-formulated stone cleaner with a neutral pH. Never use abrasive cleansers or harsh chemicals.
SPECIAL CARE
Despite good preparation and protection, occasionally your granite countertop may need special attention. Oily stains that have soaked into the surface may be removed by applying a paste made with baking soda and dish soap.
Let sit overnight, covered with plastic wrap, then rinse. If your counter has stains that are difficult to remove, or scratches, contact a stone care professional for repair.
CARE OF CUSTOM FINISHES
The polished finish is still the most popular choice, but other finishes are available, such as honed or leathered. These provide some texture, along with a matte finish, and have special care considerations. Since these finishes tend to be more absorbent, a special penetrating sealer is recommended to protect your countertop from stains, bacteria, and moisture.
Despite being sealed properly, these finishes may still show marks or discoloration when wet, particularly on black granite; this is usually harmless and will disappear when the surface dries.
Granite countertops may require a bit more care than other surface materials, such as man-made, manufactured materials – but most homeowners would agree that the extra work and consideration are well worth the effort. source
HOW TO CARE FOR YOUR GRANITE COUNTERTOPS
What’s the best selling natural stone for countertops? Granite, of course! With over 230 colors available, from subtle to dramatic, there is a wide variety of granite colors and patterns to fit every design taste and style.
And it isn’t just the natural beauty of granite countertops that makes them so popular; in large part, granite’s appeal comes down to durability and maintenance. In comparison to marble countertops and other natural stone slabs, granite is easy to clean and requires little ongoing maintenance.
#1. Guarding Against Spills and Scratches
While preparing meals, it is important to wipe up any spills quickly, especially if they are acidic liquids like citrus juice, alcohol, or vinegar. While sealed granite isn’t as vulnerable to stains as marble countertops, it is still wise to use placemats when eating or drinking acidic foods, set out padded trivets for hot foods, and avoid carelessly dropping sharp tools onto the countertop.
It is easy to keep your countertop like this serene and soothing Costa Esmeralda Granite, looking its finest by paying attention to spills and protecting it from abuse.
#2. Daily Care for Your Slab
When it comes to daily cleaning of your granite countertops, there are a few do’s and don’ts to keep in mind. First, never use a coarse or gritty cleanser on your granite or other natural stone countertops—even those marketed as “soft.” Such cleansers are sure to dull the finish, and will make your beautiful countertops vulnerable to etching and staining.
In addition, avoid products that contain ammonia, vinegar, or bleach as ingredients. Instead, simply use warm, soapy water and a sponge, and then wipe dry with paper towels. Raja Pink Granite countertops will look great for a lifetime when gently cleansed and dried at the end of each day.
#3. To Sealing
Industry experts recommend that virtually all natural stone countertops be sealed; this includes granite, marble, limestone, and onyx. The big difference is that while some of the softer stones like marble require sealing a couple of times a year, granite countertops typically need resealing only once every year or two.
Before sealing your countertop, do a quick test to see if it’s time for resealing. Wet a paper towel and leave it on the counter for 10 minutes. When you remove it, check if the area where the paper towel was is slightly discolored. If you see any discoloration, it means that some water has soaked into the granite, and the countertop should be resealed.
For some areas of your kitchen, like around the range or sink in this island adorned with Mascarello Granite, you might need to seal annually, while other counters in your kitchen that get less wet use may only need resealing every couple of years.
Granite countertops are the top choice of homeowners and home buyers nationwide, and with just a touch of care, they will last a lifetime free from stains, chips, and cracks. source
One of my nemeses when cleaning the shower or bathroom has been black mold. I can’t stand it!
And unfortunately for most of us, being a bit lazy in the cleaning department or drying department, haha. Until I found out about a couple of wonderful methods for cleaning it.
How To Get Rid Of Shower Mold
Mold in the shower can be a problem for several reasons. First, mold loves warm, damp environments, and the bathroom is often both of those things. Second, mold can cause respiratory problems for some people, particularly those with asthma or allergies. Finally, mold can be unsightly and difficult to remove. If you have a problem with mold in your shower, there are a few things you can do to get rid of it.
First, try to identify the source of the mold. Is there a leak in the shower that is causing water to accumulate and create a damp environment? If so, repair the leak and dry the area thoroughly. You may also want to consider ventilating the bathroom more to reduce the amount of moisture in the air.
If you cannot identify the source of the mold, or if the mold seems to be coming back despite your best efforts, you may need to use a mold removal product. There are many products on the market specifically designed for removing mold from showers. Follow the directions on the package carefully, and be sure to wear gloves and a mask when working with any chemicals.
Once the mold is gone, take steps to prevent it from returning. Make sure the shower is well ventilated, and dry the area thoroughly after each shower. Consider using a mold-resistant shower curtain or liner, and clean the bathroom regularly with a mold-killing cleaner.
How To Get Rid Of Black Mold In Shower
If you have black mold in your shower, you may be wondering how to get rid of it. Black mold is a type of mold that can be difficult to remove because it can grow in dark, damp places. Here are some tips for how to get rid of black mold in your shower:
Use bleach to kill black mold. Bleach is a powerful disinfectant and will kill black mold on contact. To use bleach, mix one teaspoon of bleach per cup of water in a spray bottle and spritz the moldy area. Let the bleach solution sit for several minutes before scrubbing the area with a brush or sponge. Rinse the area well with water and allow it to air dry.
Use vinegar to get rid of black mold. Vinegar is a natural disinfectant and can be used to clean black mold off surfaces. To use vinegar, mix one-part vinegar with three parts of water in a spray bottle and spritz the moldy area. Let the vinegar solution sit for several minutes before scrubbing the area with a brush or sponge. Rinse the area well with water and allow it to air dry.
Use hydrogen peroxide to remove black mold. Hydrogen peroxide is another natural disinfectant that can be used to clean black mold off surfaces. To use hydrogen peroxide, mix one-part hydrogen peroxide with three parts of water in a spray bottle and spritz the moldy area. Let the hydrogen peroxide solution sit for several minutes before scrubbing the area with a brush or sponge. Rinse the area well with water and allow it to air dry.
Use baking soda to get rid of black mold. Baking soda is a natural cleaning agent that can be used to clean black mold off surfaces. To use baking soda, mix ¼ tablespoon of baking soda per cup of water in a spray bottle and spritz the moldy area. Let the baking soda solution sit for several minutes before scrubbing the area with a brush or sponge. Rinse the area well with water and allow it to air dry.
Call a professional to remove black mold. If the above methods do not work, or if you have a large area of black mold, you may need to call a professional to remove it. A professional will be able to safely and effectively remove black mold from your home.
Does Vinegar Kill Black Mold In Shower?
Vinegar is known to be a powerful cleaning agent, but does it also work on black mold? The answer is yes! Vinegar is an effective and natural way to kill black mold in your shower. Simply mix equal parts vinegar and water in a spray bottle and mist the affected areas. Let the solution sit for an hour or two before scrubbing away the mold. Repeat this process as needed to keep your shower mold-free.
Is Black Mold In Shower Harmful?
While black mold in your shower may not be the most aesthetically pleasing sight, it is generally not harmful. However, some people may experience allergic reactions to mold, such as sneezing, coughing, and watery eyes. If you have a mold allergy or are otherwise sensitive to mold, it’s best to avoid contact with it.
Is Bleach Or Vinegar Better To Kill Mold In Shower?
If you’re looking for a natural way to kill mold in your shower, bleach and vinegar are two great options. Both of these household staples are effective at killing mold, but there are some key differences between them.
Bleach is a stronger disinfectant than vinegar and is better at killing mold spores. However, it can also be more irritating to your skin and lungs, so it’s important to use it safely. Vinegar, on the other hand, is a milder disinfectant and isn’t as effective at killing mold spores. However, it’s less likely to irritate your skin and lungs, making it a good option if you’re sensitive to bleach.
When using either of these products to kill mold, be sure to ventilate the area well and wear protective clothing, such as gloves and a dust mask.
Can I Leave Vinegar On Mold Overnight?
Vinegar is a popular household cleaning agent that can also be used to remove mold. However, some people wonder if it’s safe to leave the vinegar on mold overnight. The answer is yes, you can safely leave the vinegar on mold overnight. Vinegar is an acidic substance and will kill mold spores. However, it’s important to make sure that the area is well-ventilated so that the vinegar doesn’t cause any respiratory irritation. If you’re concerned about the smell of vinegar, you can add a few drops of essential oil to help mask the scent. If you have a severe mold problem, it’s best to call a professional mold remediation company. They will be able to safely and effectively remove the mold from your home.
How To Get Rid Of Mold In Shower Caulk
Mold in shower caulk can appear as black, green, or brownish-black streaks or spots. The mold may also appear fuzzy or cottony in texture. In some cases, the mold may cause the caulk to discolor, become brittle, or develop a musty odor. If you suspect that mold is present in your shower caulk, it is important to act quickly. Mold can cause a number of health problems, including respiratory issues, skin irritation, and allergic reactions. In addition, mold can damage the structure of your home and lead to costly repairs.
There are a few different ways to get rid of mold in shower caulk. One option is to use a commercial mold remover. These products are designed to kill mold and mildew and can be found at most hardware stores. Another option is to make your own mold remover using household ingredients. If you have a mold problem that is particularly stubborn, you may need to replace the shower caulk altogether. To do this, remove all of the old caulk from the shower using a utility knife or caulk remover. Clean the area thoroughly with soap and water. Once the area is clean, apply a new layer of caulk.
Preventing mold growth in shower caulking is also important. To do this, make sure to use a mildew-resistant caulk when sealing your shower. In addition, regularly clean your shower and shower caulking with a mildew-fighting solution. Finally, repair any leaks in your shower immediately to prevent moisture from building up and creating an environment where mold can thrive.
Why Does My Shower Caulk Get Moldy?
One of the most common causes of moldy shower caulk is poor ventilation. If your bathroom doesn’t have a window or exhaust fan, the humid air can condense on the cold surfaces of your shower, like the tile and grout. This moisture provides the perfect environment for mold to grow. You can prevent this by opening a window or turning on the exhaust fan every time you shower. Another common cause of moldy shower caulk is using the wrong type of caulk. There are two types of caulk: silicone and acrylic. Both are waterproof, but silicone is much more resistant to mold and mildew. If your shower caulk is made of acrylic, it’s more likely to get moldy. You can prevent this by using silicone caulk instead.
Why Is The Grout In My Shower Turning Black?
The grout in your shower may be turning black due to a number of reasons. One possibility is that the grout is not properly sealed. If the grout is not sealed, water can seep into it and cause mold or mildew to grow. Another possibility is that the water in your shower is too hot. Hot water can cause the grout to break down and turn black. Finally, if you have hard water, the minerals in the water can build up on the grout and cause it to turn black. If you are not sure what is causing the grout in your shower to turn black, you should contact a professional for help.
How Do I Clean Black Mold In Shower Silicone?
Cleaning black mold from shower silicone is a bit more difficult than cleaning it from other surfaces. This is because silicone is a porous material, which means that the mold can penetrate into the surface and be much more difficult to remove. There are a few things you can do to clean black mold from shower silicone, however, and we’ll go over those now.
One of the first things you can do is to try and remove the mold with a toothbrush or another soft-bristled brush. This will work best if the mold is on the surface of the silicone, and if it’s not too deeply embedded. If the mold is deeper than just a surface level, though, you’re going to need to use something a bit more abrasive.
You can also try using a vinegar solution to clean black mold from shower silicone. Vinegar is a natural disinfectant and mold killer, so it’s definitely worth a try. Just mix up one part vinegar with three parts water in a spray bottle and mist the affected areas. Let it sit for a few minutes, then scrub at the mold with a brush or sponge.
If neither of those methods works, you can always try using bleach. Bleach is a powerful disinfectant and will definitely kill any mold that’s present. Just be careful when using it, as it can also damage the silicone if it’s not used properly. Make sure to dilute the bleach to one teaspoon of bleach per cup of water before spraying it on, and always test a small area first to be sure.
Once you’ve removed the mold, you should thoroughly clean the area with soap and water to remove any residual mold spores. Follow these steps and you should be able to clean black mold from shower silicone without too much trouble. Just be patient, as it may take a few tries to get all of the mold removed. If you’re still having trouble, you can always call in a professional to help you out. They’ll have the right tools and products to get the job done quickly and efficiently.
How To Get Rid Of Mold In Bathroom
Mold can be tricky to spot, especially in the early stages. Keep an eye out for any signs of discoloration on walls, ceilings, or floors; musty odors; and any visible mold growth. If you see or smell anything suspicious, it’s time to start cleaning.
Is Bathroom Mold Harmful?
While not all mold is harmful, some types can release spores that cause respiratory problems, trigger allergies, and irritate your skin. If you have a mold problem in your bathroom, it’s important to take care of it right away to prevent these health risks. If you see small patches of mold, you can usually handle the problem yourself with some elbow grease and the right cleaning supplies. For larger mold problems, it’s best to call in a professional.
What Kills Mold In A Bathroom?
There are a few things that can effectively kill mold in a bathroom. You can use a bleach solution, vinegar, or commercially available mold cleaners. Be sure to follow the manufacturer’s instructions when using any of these products.
Bleach is probably the most well-known mold killer. To make a bleach solution, mix one teaspoon of bleach per cup of water. Apply the solution to the moldy area and let it sit for about 15 minutes. Be sure to wear gloves and a mask when handling bleach.
Vinegar is another common household product that can kill mold. To use vinegar, mix one-part vinegar with three parts water. Apply the solution to the moldy area and let it sit for about an hour.
There are also a number of commercially available mold cleaners that can be effective in killing mold. Be sure to follow the manufacturer’s instructions when using any of these products.
Whichever method you choose, be sure to take precautions to protect yourself from exposure to mold. Wear gloves and a mask when handling any of the products mentioned above. In addition, open a window or turn on a fan to provide ventilation when using any of these products.
What Kills Mold Better Bleach Or Hydrogen Peroxide?
There is some debate over which one of these two common household products is more effective at killing mold. Both bleach and hydrogen peroxide can be effective, but they each have their own pros and cons. Bleach is a strong chemical that can kill mold quickly. However, it can also be corrosive and harmful to surfaces. Hydrogen peroxide is a weaker chemical than bleach, but it is less likely to harm surfaces.
Ultimately, the choice of which product to use depends on your personal preference and the situation. If you are trying to kill mold on a surface that is sensitive to chemicals, hydrogen peroxide may be a better choice. If you are trying to kill mold quickly, bleach may be a better choice.
Does Vinegar Remove Mold?
Vinegar is a household product that can be used to clean mold. To use vinegar, mix one-part vinegar with three parts water. Apply the solution to the moldy area and let it sit for about an hour. Vinegar can be effective in removing mold, but it is not as effective as some other products. If you are trying to remove mold from a surface that is sensitive to chemicals, vinegar may be a better choice.
Can I Paint Over Mold In Bathroom?
It is not recommended to paint over mold in a bathroom. Mold can grow on painted surfaces, so painting over mold will not prevent it from growing. If you must paint over mold, be sure to use mold-resistant paint and take precautions to protect yourself from exposure to the mold.
How Do You Get Rid Of Mold In Bathroom Before Painting?
The best way to get rid of mold in a bathroom before painting is to clean the moldy surfaces with a bleach solution, vinegar, or commercially available mold cleaners. Be sure to follow the manufacturer’s instructions when using any of these products.
In addition, it is important to take precautions to prevent the mold from coming back. Be sure to dry the surfaces thoroughly after cleaning and keep the area well-ventilated. When painting, be sure to use mold-resistant paint.
How To Clean Bathroom Tile Mold
Mold on bathroom tile can appear as dark spots or stains. It may also look fuzzy or powdery. Mold can grow on any type of tile, including ceramic, porcelain, and natural stone.
What causes mold on bathroom tile?
Mold loves damp, warm, and humid environments—all of which are common in bathrooms. A leaky shower, toilet, or sink can create the perfect conditions for mold to grow. Poor ventilation can also contribute to mold growth.
What Kills Mold On Bathroom Tile?
To kill mold on bathroom tile, you’ll need to use a disinfectant or anti-fungal solution.
Here are a few things you can use:
Bleach: Bleach is a powerful disinfectant that can kill mold spores. Mix one teaspoon of bleach per cup of water, and apply the solution to the affected area. Let it sit for 10-15 minutes before scrubbing away the mold with a brush.
Vinegar: Vinegar is another effective mold killer. Mix one part vinegar with three parts water, and apply the solution to the tile with a sponge or cloth. Let it sit for 10-15 minutes, then scrub the mold away with a brush.
Baking soda: Baking soda is a natural disinfectant that can kill mold spores. Make a paste by mixing equal parts of baking soda and water, and apply it to the tile with a sponge or cloth. Let it sit for 10-15 minutes, then scrub the mold away with a brush.
Hydrogen peroxide: Hydrogen peroxide is a powerful disinfectant that can kill mold spores. Mix one part hydrogen peroxide with three parts water and apply to the affected area with a sponge or cloth. Let it sit for 10-15 minutes, then scrub the mold away with a brush.
How Do You Keep Bathroom Tiles Mold Free?
To keep bathroom tiles mold-free, you’ll need to take some preventative measures.
Here are a few things you can do:
Keep the bathroom clean: Wipe down the shower, tub, toilet, sink, and tile regularly with soap and water. Use a mildew-resistant cleaner on the tile and grout.
Fix leaks: A leaky shower, toilet, or sink can create the perfect conditions for mold to grow. Fix any leaks as soon as possible.
Increase ventilation: Poor ventilation can contribute to mold growth. Keep the bathroom well-ventilated by opening a window or running the exhaust fan during and after showers.
Use mold-resistant products: When remodeling or building a new bathroom, choose mold-resistant materials. These include mold-resistant drywall, tile, grout, paint, and caulking.
Clean up spills immediately: If you spill something on the floor, wipe it up right away.
Dry wet areas: After showering, bathing, or washing the floors, make sure to dry wet areas thoroughly. Use a towel or mop to remove any water that’s pooled on the floor.
Keep humidity in check: Use a dehumidifier to keep the bathroom air dry. Aim for a relative humidity of 30-50%.
By following these tips, you can keep your bathroom mold-free and looking its best. source
How Do I Remove Mould From Silicone
Once you have cleaned the mold off the shower floor, you should now apply a layer of bleach to the floor. Then, you can follow this up with a layer of baking soda to get rid of any remaining spores. Then, apply a layer of baking soda to the mould from the floor. Then, you can clean it up with hydrogen peroxide. This solution will work to remove any traces of mould on the shower’s floor.
How To Get Help Removing Mould In Melbourne
If you are still unable to get rid of all of the moulds in your property even with the information above, our team of mould specialist gold coast are ready to assist you instead. AbsoluteMouldRemoval is a dedicated team of professionals that specializes in mould remediation Melbourne. Contact us now to know how we can help you.
How To Remove Mould From Shower Floor FAQs
How Do You Get Mould Off Silicone Around The Shower?
Bleach and water will kill any remaining mould spores. Spray a 1-part bleach to 4-part water solution liberally over the sealant and let it dry. Using a sponge and cool water, re-rinse the area. Using a clean microfibre cloth or towel, pat dry.
Does Vinegar Kill Black Mould In Shower?
White vinegar is a mildly acidic cleaning, deodorising, and disinfecting agent. On porous and non-porous surfaces, it can also kill 82% of mould species, including black mould. Spray the mouldy surface with vinegar and let it sit for an hour. Finally, clean the area with water and allow it to air dry.
What Is The Best Cleaner To Remove Shower Mould?
11 Mould and Mildew-Removing Shower Cleaners Mould and Mildew Bathroom Cleaner Gel; Naturally It’s Clean Mildew Stain Cleaner; Mould Boss Professional Mold And Mildew Remover, Cleaner; Mould Boss Professional Mould And Mildew Remover, Cleaner; Mold Boss Professional Mold And Mildew Remover, Cleaner; Mould Boss Professional Mould And Mildew Remover, Cleaner; Mold Boss Professional Mold And Mildew Remover, Cleaner Mould Armor FG502 Mould And Mildew Killer + Quick Stain Remover; ZEP Mould Stain And Mildew Stain Remover; ZEP Mold Stain And Mildew Stain Remover; ZEP Mold Stain And Mildew Stain Remover; Mould Armor FG502 Mould And Mildew Killer + Quick St
How Do You Remove Black Mould From Silicone Sealant?
Bleach and water will kill any remaining mould spores. To remove black mould from silicone sealant, spray a 1-part bleach to 4-parts water solution liberally over the sealant and let it dry. Using a sponge and cool water, re-rinse the area. Using a clean microfibre cloth or towel, pat dry.
Does Vinegar Kill Black Mould In Shower?
Yes, white vinegar is a mildly acidic cleaning, deodorising, and disinfecting agent. On porous and non-porous surfaces, it can also kill 82% of mould species, including black mould. To clean mould using vinegar, pray the mouldy surface with it and let it sit for an hour. Finally, clean the area with water and allow it to air dry.
Can I Remove Black Mould Myself?
A simple mixture of bleach and water can help if the black mould growth in your home is small enough for you to treat on your own. Commercial black mould removal products are also available. Scrub the mould spot with the cleaner to get rid of the growth. When you’re finished, make sure to thoroughly dry the area.
Items You Need To Remove Black Mould From Silicone Sealant
Black mould can be dangerous, and so can professional cleaning products, so be sure to use the appropriate personal protective equipment (PPE). Remove all PPE once you’ve finished removing the mould and wash the items separately. Below is an overview of the safety gear you’ll need.
Gloves
Face mask
Eye protection
Protective clothing
Protective gloves made of nitrile, rubber, or latex will help to prevent allergic attacks and skin irritation from contact with black mould and harsh cleaning products.
A face mask, preferably an N95 respirator, will help you avoid inhaling mould spores, which can cause respiratory infections and serious breathing issues.
Protective goggles will stop mould spores and cleaning products from getting into your eyes.
You’ll need to cover and protect your skin, so put on old, long-sleeved shirts and pants. Do not leave any skin exposed.
You’ll need to prepare your cleaning equipment as well. We’ve put together a brief overview of the cleaning supplies you’ll need for efficient black mould removal.
Bicarbonate of soda / baking soda
Baking soda has gentle abrasive properties that can be mixed with white vinegar to create a more effective paste.
White vinegar
Vinegar is a natural, non-toxic cleaner that’s effective in killing mould and removing it from silicone sealant.
Spray bottle
A spray bottle is useful for applying the vinegar evenly across the mould-affected area.
Scrub brush / old toothbrush
A small brush, such as a toothbrush or a scrub brush, can help you reach the small crevices and thoroughly scrub away mould from the sealant.
Old cloth or paper towel
Use these for wiping away excess cleaning solution and mould debris once the cleaning process is complete.
Now that you have everything you need to remove mould from silicone sealant, let’s talk about the steps you should follow.
Steps
Steps To Remove Black Mould From Silicone Sealant
Prepare the area and protect yourself
Before you start cleaning, put on your PPE to ensure you’re protected from inhaling mould spores or coming into contact with any potential irritants. Open windows and doors to allow for proper ventilation and remove any objects or furniture from the mould-affected area, if possible. Black mould is a common problem in bathrooms, which often don’t have sufficient ventilation or natural light. If you need to clean mould off bathroom sealant, try to ventilate the bathroom as much as possible before you start cleaning.
Apply undiluted vinegar
Fill a spray bottle with undiluted white vinegar, then spray this solution onto the mould-affected silicone sealant. Cover the mouldy areas thoroughly and allow the vinegar solution to sit for 30 minutes. This will allow the vinegar to penetrate the mould and weaken its bonds to the sealant.
Scrub the sealant
Use a toothbrush or scrub brush to gently scrub the silicone sealant, paying special attention to the areas where mould is present. Apply enough pressure to remove mould from the sealant, but not so much that you risk damaging the sealant itself. This is crucial to maintaining the integrity of the seal.
Rinse and dry
After scrubbing, wipe the area with a clean, damp cloth or paper towel to remove any loosened mould and remaining vinegar solution. Rinse the cloth or towel frequently to avoid spreading mould to other areas. Once the sealant is clean, dry the area thoroughly to prevent mould growth in the future.
Apply a baking soda paste
Mix a paste of equal parts baking soda, water, and white vinegar. Apply a thick layer of this paste to the mould-affected silicone sealant, then use the toothbrush or scrub brush to scrub away the remaining mould. Rinse and dry the area again, as described above.
Use a commercial mould remover (optional)
In some cases, vinegar and baking soda might not be enough to fully eradicate stubborn mould. If this is the case for you, consider using a commercial or professional mould remover to clean the affected sealant. Choose one specifically designed for black mould removal, and follow the manufacturer’s instructions for best results. Remember to follow the safety precautions on the packaging, as some chemicals can be harmful if not handled properly. It’s also important to note whether the product you choose can be used on silicone sealant without damaging it. Some popular professional mould-cleaning products are described below:
Professional products
How to use
Selleys Rapid Mould Killer
Spray onto the affected area, leave it to work for 3 minutes, then wipe or scrub off with a soft-bristled brush.
Ajax Professional Mould Remover
Spray onto the mouldy area, let it sit and work for 5 minutes. Then wipe the surface with water.
Concrobium Mould Control Spray
Spray onto the affected area, let it dry, and then remove any mould residue with a microfibre cloth or soft brush.
By following these steps, you should be able to effectively remove black mould from your silicone sealant and restore a clean, healthy environment in the affected area. Remember to be patient and persistent, as some mould may require multiple cleaning attempts to eradicate completely. source
Do not use the reglazed sink, bathtub, or refinished surface for 48 hours after we are done. Nothing should be placed on the fixture, especially water.
First 7 Days After Reglazing
Do not lay soap, bottles, or any object on the reglazed surface.
Be sure the taps are closed tightly and are dry every evening.
Clean the finish gently, only with water and a soft sponge.
After 7 days— Long-Term Maintenance to Your Refinished Fixture
Do clean the reglazed surface with spray cleaners or a spray such as 3M® Scotch Brite® Stay Clean Scrubber, CRL® Bathroom & Kitchen Cleaner, Formula 409® Multi-Surface Cleaner, Mr. Clean® All Multi-Surface Liquids, Lysol® Power Bathroom Cleaner, Scrubbing Bubbles® Mega Shower Foamer Trigger, and a cloth, or moistened sponge and water.
Do not use abrasive cleaners as they will damage the refinishing.
All chemicals must be kept away from the finish. Acid-bearing compounds (drain openers, tile grout, etc.) may stain, mark, or damage the reglazed surface.
Do not drop sharp or heavy objects on the fixture’s surface, as they may cause it to chip.
Do not slice items without a cutting board on the reglazed kitchen countertops.
Do not place rubberized mats or daisy stickers in the bathtub, on tile, or other surfaces, as they will damage it when removed. Most mats will produce a reaction with the finish when subjected to hot water.
Leaky faucets must be repaired to protect the refinishing of the surface against the eroding action of dripping water. This may cause the finish to crack and wear out prematurely.
What Cleaners Should I Use in a Reglazed Surface?
CARE AND MAINTENANCE OF REGLAZED SURFACES
Now that you have a newly refinished bathtub, you want to keep it that way. So how do you clean a reglazed or painted bathtub to keep the commercial coating sleek and shiny? The coating needs to be cleaned frequently with mild cleaners and soft sponges but it helps to know exactly what to use to clean a reglazed bathtub.
Use Dish Soap in a Pinch
You can safely use gentle liquid dish soap, such as Dawn, Palmolive, or Ajax (Ajax dish soap, not cleaning powder) to clean a refinished tub.
Why Liquid Non-Abrasives Work Best
Whether you’re the owner of a DIY-finished or professionally finished tub, it’s best to use only soft liquid cleansers to clean and maintain the coating. The reason is that a refinished tub coating is layers of specialized paint that can be nicked or scratched without care, so it’s best to stick to non-abrasive cleaners. However, for non-abrasive cleaners to work effectively, you will need to clean the tub frequently before soap scum or hard water deposits develop.
Most refinishing companies and DIY tub coating manufacturers seem to agree on a few commercial cleaners that are safe to use on refinished tubs, including:
When it comes to cleaning a reglazed bathtub, it’s important to use non-abrasive cleaners that won’t scratch or damage the surface. Here are some safe options:
Mild dish soap cleaners: A gentle dish soap diluted in warm water is a safe and effective way to clean a reglazed bathtub. Please read the the instructions and chemicals added to a specific cleaner. You can use the following brand products:
409
Fantastic
Mr. Clean
Bon ami
Simple Green
Foam cleaner scrubbing bubbles
Lysol
White vinegar: White vinegar is a natural cleaner that can help dissolve soap scum and hard water deposits on the bathtub’s surface. Mix equal parts vinegar and water, apply the solution to the bathtub, let it sit for a few minutes, then rinse with water. Please be aware, vinegar can yellowish your glaze. Do not use high concentrated vinegar.
Baking soda: Baking soda is a mild abrasive that can help remove stubborn stains on a reglazed bathtub. Make a paste by mixing baking soda with water, apply it to the stains, let it sit for a few minutes, then rinse with water.
Non-abrasive bathroom cleaners: There are many non-abrasive bathroom cleaners available that are safe for use on reglazed bathtubs. Look for products that are labeled as safe for use on acrylic, fiberglass, or porcelain surfaces.
Do Not Use Abrasives
Remember to avoid using harsh cleaners, such as bleach, ammonia, (Ajax, Comet, etc) or any abrasive powders, which can damage the reglazed surface of the bathtub. Additionally, avoid using scrub brushes or other abrasive tools that could scratch the surface.
Abrasives include harsh or gritty cleaners as well as rough sponges, like Scotch-Brite pads, steel wool soap pads, or sponges with an abrasive layer on one side. Most refinishers and tub coating manufacturers also warn against any products containing bleach or ammonia. Avoid using these common cleansers when cleaning a reglazed tub:
Powdered cleansers: This includes products like Ajax or Comet: Both products are abrasive and contain bleach.
Bar Keepers Friend: Since this product does not contain bleach, it’s often advertised as a more gentle way to clean than using Ajax or Comet. But the abrasives still can scratch the tub.
Ammonia: Do not use ammonia or any cleaners containing ammonia.
Bleach: Straight household bleach or cleaners boosted with bleach should not be used on reglazed tubs.
Abrasive cream cleansers: Some of these products even contain the word “soft” in their name, but they still aren’t soft enough for refinished tubs.
Do Not Steam Clean
A household steam cleaner with a scrubbing attachment may seem like a good way to get rid of all that dirt and soap gunk without using abrasives. Unfortunately, steam doesn’t get the job done when it comes to reglazed tub finishes, and it could quickly damage the finish, especially if it gets underneath the coating or through any cracks.
Do Not Power Wash
Power washing old or original tile in a tub and shower can be done but it’s not common and you should never attempt it on a reglazed surface. The action is simply too powerful for the coating to withstand. Power washing a reglazed surface could easily lead to peeling or other damage to the coating. It would also void the warranty on a professional refinishing job. s1s2


.jpg)

